Timbah Rooftop Herb Garden: part 5 How to build a wicking bed in a concrete basin
This isn’t usually the sort of item I would consider using in a build (too heavy, nearly impossible to move and have uneven bases a lot of the time) but it was there on the roof/balcony and it was part of Tim’s vision for the garden to use the double concrete basin as a bed for mint and cress. Besides, you see these things all over the place, right? So best we find a way of making them even more useful as a planter.
As previously blogged I am using wicking beds for this job because regular watering will be a challenge for the busy staff and budget is tight (ruling out automatic irrigation.)
So making a S.I.P. out of a concrete container. No worries, easy right? Remember for a S.I.P. you need a drainage hole at the level just below the soil. And also remember this is a concrete basin… Now seeing as I like to do things the easy way I decided to use the sink hole as the drainage and not have to drill through concrete – but how to make it drain from the level just below the soil at the top of the reservoir? You guessed it, whack a tube over the sinkhole!
What you will need:
- 1 concrete basin (make sure it’s nice and clean and free of dust and dirt)
- A couple of days (to allow adhesive to set fully)
- A couple of mates
- Some beers or suitable barter currency for your mates (see above)
- 1 shipping pallet or a strong platform for the basin to sit on so water will drain away freely
- Some wood offcuts (or something to level the basin if it doesn’t sit level on the pallet/platform)
- 1 PVC drainpipe per sinkhole – wide enough to cover the sinkhole (for this one I needed two drainpipes)
- Electric drill + 6mm drill bit for drainpipe (can be bigger hole if you don’t have 6mm) and 3 mm for reservoir containers if recycling containers
- 1 file/rasp to shape the end of the tube to match the area around the sinkhole
- Adhesive (suitable for fixing PVC to concrete – See step 9)
- 1 sheet of light to medium grain sandpaper
- Reservoir filling materials. For this build I used milk bottles, a soda bottle, vinegar container (all with lods of holes drilled in them to allow evaporation to pass up through into the soil) and grey metal/gravel
- Separation material: I used shade cloth
- 1 marker pen
- Scissors for cutting the separation material
- Growing media: I used potting mix, a layer of shredded newspaper and compost with lucerne for mulch but you can use what you feel is best here and of course will depend on what you are growing
Here’s how I did it:
Step 1
Position your base for the tub. I used a shipping pallet to accommodate the uneven base of the tub. Use your favourite search engine to look up who sells used ones in your area or just find one that someone has left lying about someplace.
Step 2
Call a couple of mates to help you lift the heavy tub into place.
Step 3
Position the tub on your chosen surface ensuring it will drain from the base freely
Step 4
Cut a couple of lengths of PVC drainpipe. They need to be a diameter wide enough to cover the sinkhole.
Step 5
Shape the end of the tube that will cover the sinkhole so that when you look down the tube, there isn’t much light coming in at the base. (Don’t worry about making it perfect as you can just add more glue at the glue step.)
Step 6
Sand the area of the tube that will come into contact with the adhesive (or if you want, spend the money they suggest and buy the PVC primer and apply it – I didn’t bother)
Step 7
Figure out the depth of your reservoir layer then mark just below that level on your tube/s and drill several holes around the tube/s.
Step 8
Make sure you have swept the area around the sinkhole so no particles of dust or dirt remain. I brushed it thoroughly then flushed it with water before I began so it would have time to dry.
Step 9
Apply the glue around the sinkhole. I used Sikaflex f11, an adhesive suitable for potable water that works on concrete and most other surfaces. Remember you want to not only stick the tubes securely but also seal the sinkhole so no water drains out. Again look down the inside of the tube to see if any light is coming in. Use a cloth or paper towel to smooth the glue around the tube and ensure a complete seal.
Step 10
Prepare the watering tube/s. I didn’t actually use any for this tank as you will see from the pics but if you want to add them, now is the time. Cut them the desired length (same as the other pipes), drill a few holes near the bottom then place them in the tub. Depending on the type of adhesive, you will need to leave it to set. I left mine for a few days as I had other stuff to do.
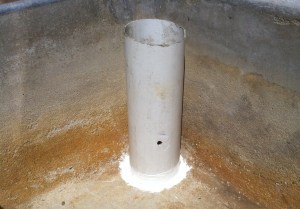
A closer look at the drainage tube in place with a drain hole visible. Note the use of adhesive to act as sealant and adhesive
Step 11
Assemble the reservoir using your chosen media. I used a collection of waste items from the restaurant (mainly milk bottles) and then some gravel to top it off but you could use gravel on its own, sand, expanded terracotta beads (which are good as they are round so create space between the beads for the water) or basically whatever will hold the weight of the soil layer up out of the reservoir layer. Level it all off.
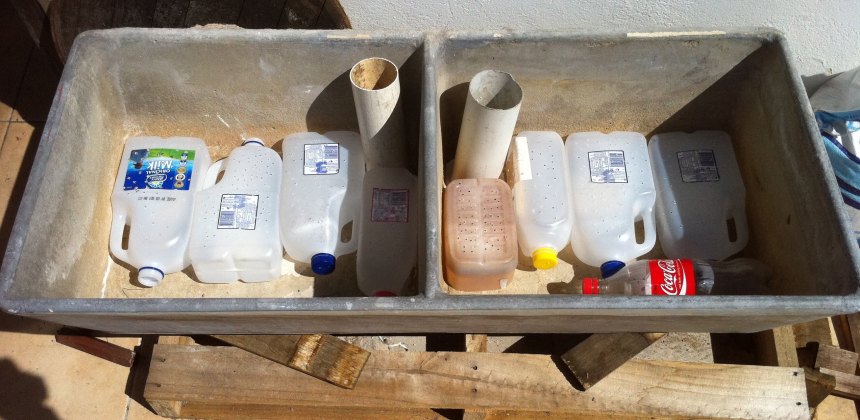
The reservoir: note use of restaurant waste (cleaned) milk bottles, vinegar container and a soda bottle
Step 12
Add the separation layer. I used shade cloth but again as previously mentioned in this blog, you could use hessian sack, straw or anything porous, some choose not to use a separation layer at all. The function of this layer is to separate (probably why it’s called the separation layer) the water reservoir from the growth media so the plants don’t get soggy feet and end up with root rot). Layer the material over the tubs and trace the area you will need to cut and mark where the drain pipes are. Cut an “X” to accommodate the tubes and cover the drain holes with the flaps you made with the “X”.
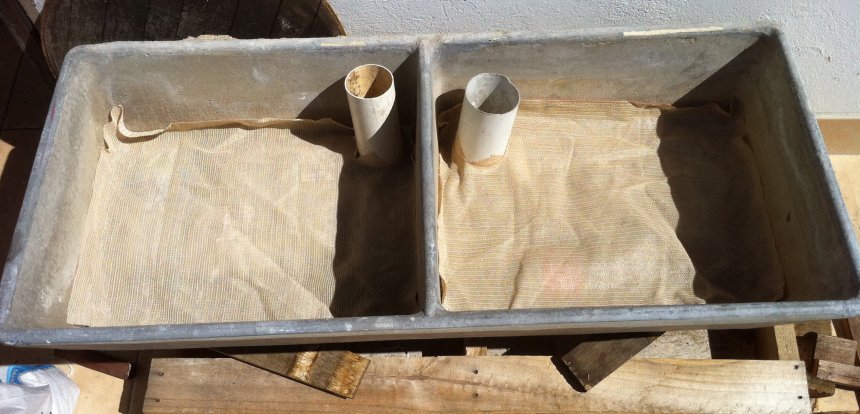
Shade cloth used to separate soil from reservoir. Note the flaps from the incision cover the drain hole
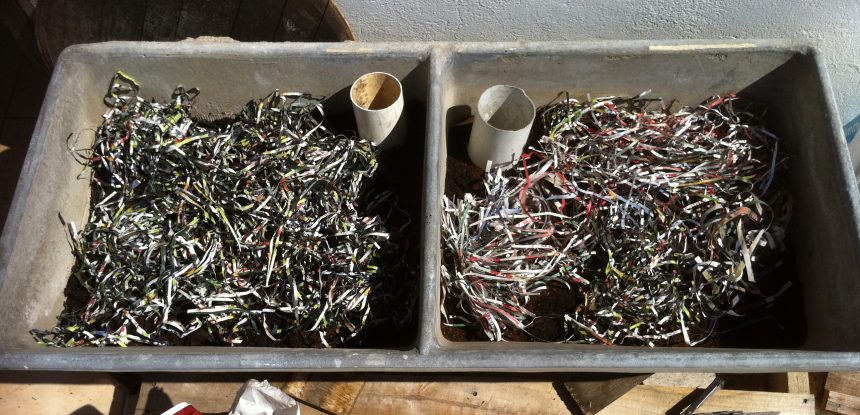
After adding potting mix, I added a layer of shredded newspaper (a waste item from the business) then more potting mix, compost, manure and then mulch
Step 13
Add your growing media. I started with potting mix, then a layer of shredded newspaper, then potting mix again, then compost, cow manure then lucerne mulch.
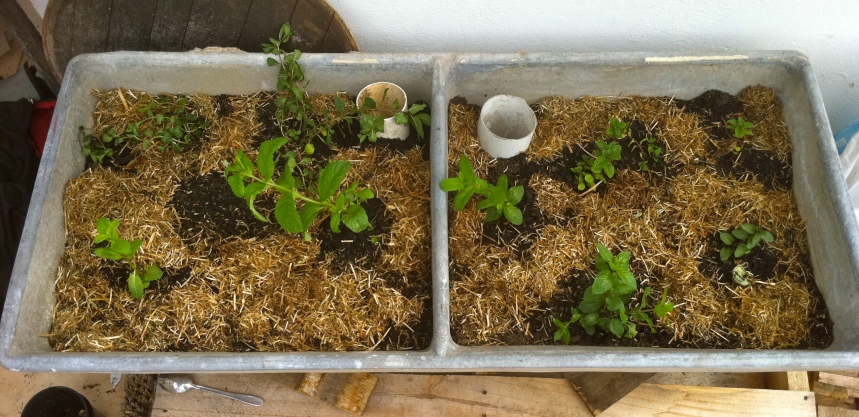
Newly planted double concrete basin. Chocolate mint, winter mint, apple mint, common mint with some "Good Bug" mix seeds sown for good measure
Now plant it out and make yourself a cuppa then stand there looking at it with a sense of satisfaction and achievement. Ahhh!


2 Responses to “Timbah Rooftop Herb Garden: part 5 How to build a wicking bed in a concrete basin”
What are “Good Bugs seeds” ?
They’re a selection of self-seeding annuals that have flowers attractive to predatory insects that munch on pest insects.